There is nothing that says fall like pumpkins! Janome Artisan Mitzi Redd has created a delightful quilt pattern that includes a collection of colorful pumpkins made with precuts for a fast finish!
So how about a little bit of pumpkin spice for all who are nice? A few weeks ago I thought it would be really fun to work up a fall-themed quilt since I actually don’t have one around the house. Now that I’m also working a full-time job in the banking industry again my quilting time has unfortunately become very cramped, so I knew it would have to be something that would not only be quick, and easy but also fast to finish. Thankfully I was able to wrap up those ideas into one very fun-themed pumpkin quilt. The great thing about this design is that you can take the same pumpkin block shown in the quilt and use it as a stand-alone piece for a pillow, use multiple ones for a table runner, or use your imagination and turn it into anything and everything you might like.
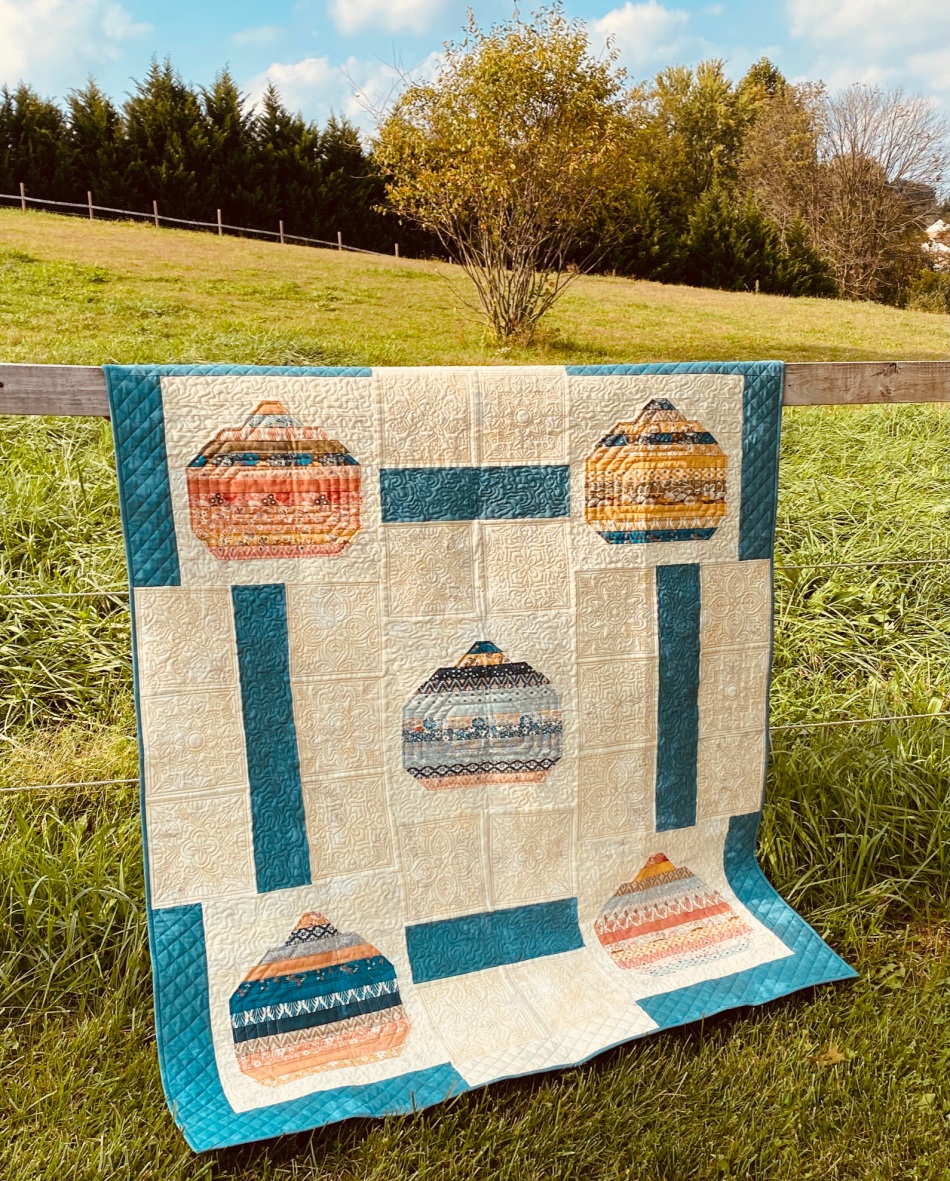
The pumpkin blocks are unfinished at a 16 1/2″ x 16 1/2″ square that you will then trim down to a 16″ square before putting it into the quilt, which makes them a great size to use for all your decorating wants and needs. Just let your imagination run free with thoughts of pumpkin spice filling the space.
For the quilt shown, I went into my fabric stash and pulled out a 1 1/2″ honey bun roll from Moda Fabrics. The fabric used is Cider by Basic Grey for Moda Fabrics. I absolutely love using precut fabrics. It can really save you time on your cutting and piecing when they are all ready to go for you. While the quilt only calls for 5 pumpkin blocks, one 40 strip honey bun roll will actually give you 9 pumpkins. Be aware though, the measurements for the quilt are only provided for making 5 pumpkins.
While the design may look tough, it’s a very easy quilt to make. The key is making sure your 45-degree angles are cut correctly, so do you take your time. The directions do show a visual to help you make the cuts but don’t fret in case you make a mistake and have to recut, you have no idea how many times I did before it made sense and I could figure out how to explain it to someone else. As always, in case there is confusion, just let me know and I’ll gladly help walk you through it.
Now, let's talk about the dramatic parts of the quilt that you see in the picture, the plain tan blocks with the intricate quilt designs. I would love to take ownership of all that beautiful work but it wouldn’t be honest of me to do so. The designs used are purchased designs from the website Embroidery Library called Autumn Kaleidoscope Quilting.
Since I quilt using the Janome Horizon Quilt Maker Memory Craft 15000, it was very easy to set up the design, slightly resize it to fit my blocks, and stitch away. The hoop I used for my MC15000 was the ASQ22 embroidery hoop. This hoop comes with a hard plastic grid for placing the quilt in the hoop, and heavy-duty magnets to hold it all in place. Now, I could have saved even more time using the Janome AcuSetter and my Ipad, but I chose to do it by manually placing the quilt in the hoop and working it through the placement on the screen. I chose to do it this route because my Ipad battery was dead and by the time it was charged I was cranking right through all the designs and just decided to stick with how I had started. As you can see from the photos, June also enjoyed me taking my time on the quilt as she “held it down” every time I tried to step away.
After completing the main blocks, I then moved on to finishing the areas around the pumpkins and the borders. For the area around the pumpkins, I chose just a meandering free-motion stitch. The pumpkins and borders were then stitched with straight lines to just fill in the areas. I used an echo-style ruler stitching for the inside of the pumpkins and then moved to cross-hatch lines for the borders. I did choose to use the Janome Ruler Work foot for both the free motion meandering stitching as well as the ruler work areas instead of switching out feet for different techniques. These types of stitching also helped to keep the pace moving quickly as I worked to get the quilt completed before the first of October.
Once all the quilting was completed, it was easy and quick to trim the quilt and bind. I chose to bind the quilt in the same blue shade as the borders to keep the consistency but you can certainly pick if you want your binding to blend or pop off the quilt. For binding, I used 6 strips of fabric measuring 2 1/2″ by the width of fabric and chose to machine stitch it all the way versus any hand binding (again to save time).
Overall the techniques of combing quilting and embroidery work into the quilt helped to not only speed up the process but also add a new element of beauty to the design. For those who don’t have access to a longarm machine, it can sometimes be discouraging to see some of the gorgeous quilts completed with the automation system. I encourage you to look at your own embroidery machine and put it to work doing the quilting work for you. No embroidery machine? No problem there either, there are plenty of beautiful stencils out there you can trace, or maybe you are one of the amazing people who can draw (I can’t draw a stick figure) and can take the chalk and draw out your own design to stitch out. Don’t be afraid to put your machine to work and let it work for you. You may just be surprised to discover just how little of your machine you’re actually using. Embroidery, decorative stitches, quilting techniques, are all there at your fingertips.
Notes:
The fabric used for the quilt shown is by Basic Grey for Moda Fabrics in the Grunge and Cider fabric lines.
Piecing, quilting, and embroidery are all completed on my Janome Horizon Quilt Maker Memory Craft 15000. See your local Janome dealer for details about the MC15000 and all the other machines in the Janome family of sewing, quilting, embroidery, and sergers.
Enjoy the pattern, Pumpkin Spice, and Everything Nice!